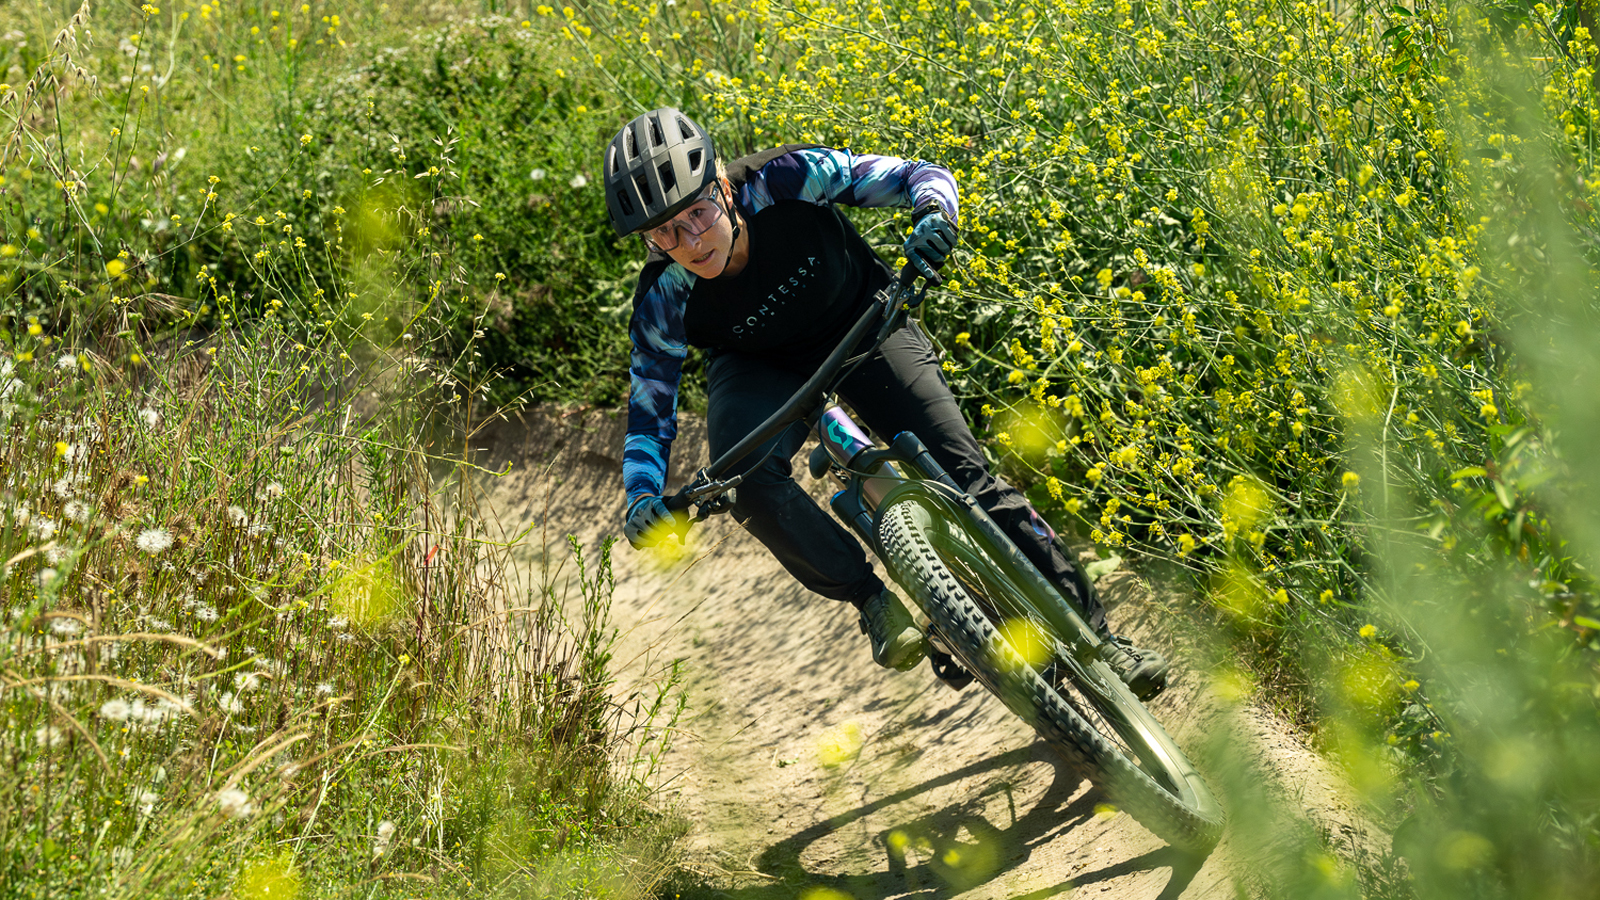
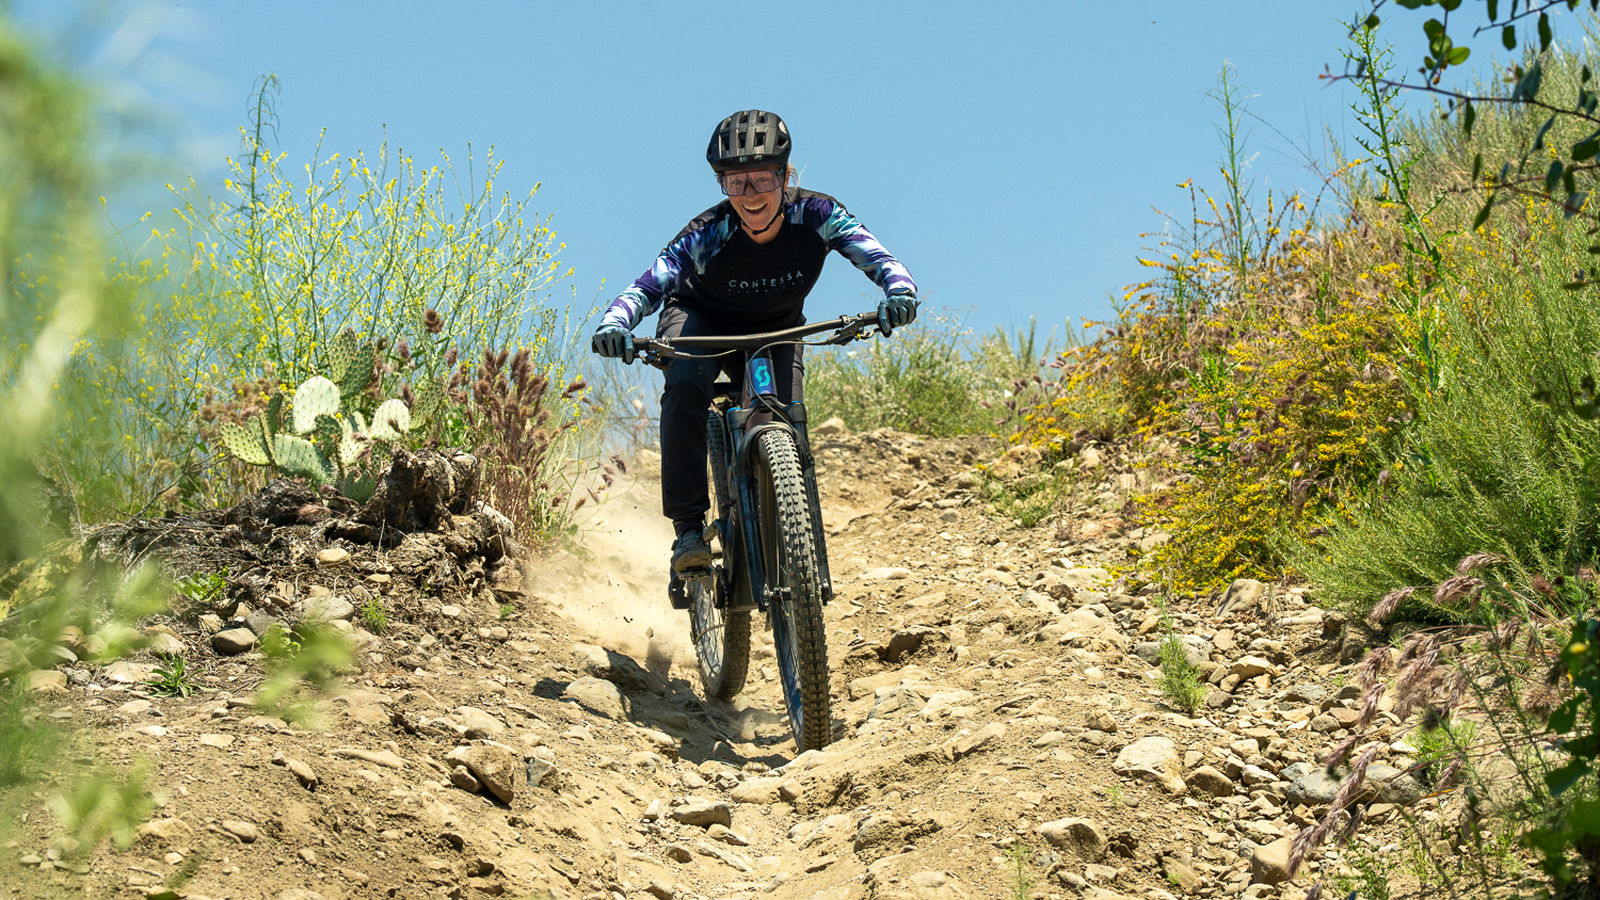
First of all, a successful ride starts with a well-maintained bike and a pre-ride check. So start by taking a look at our tips on how to prepare your bike for the ride
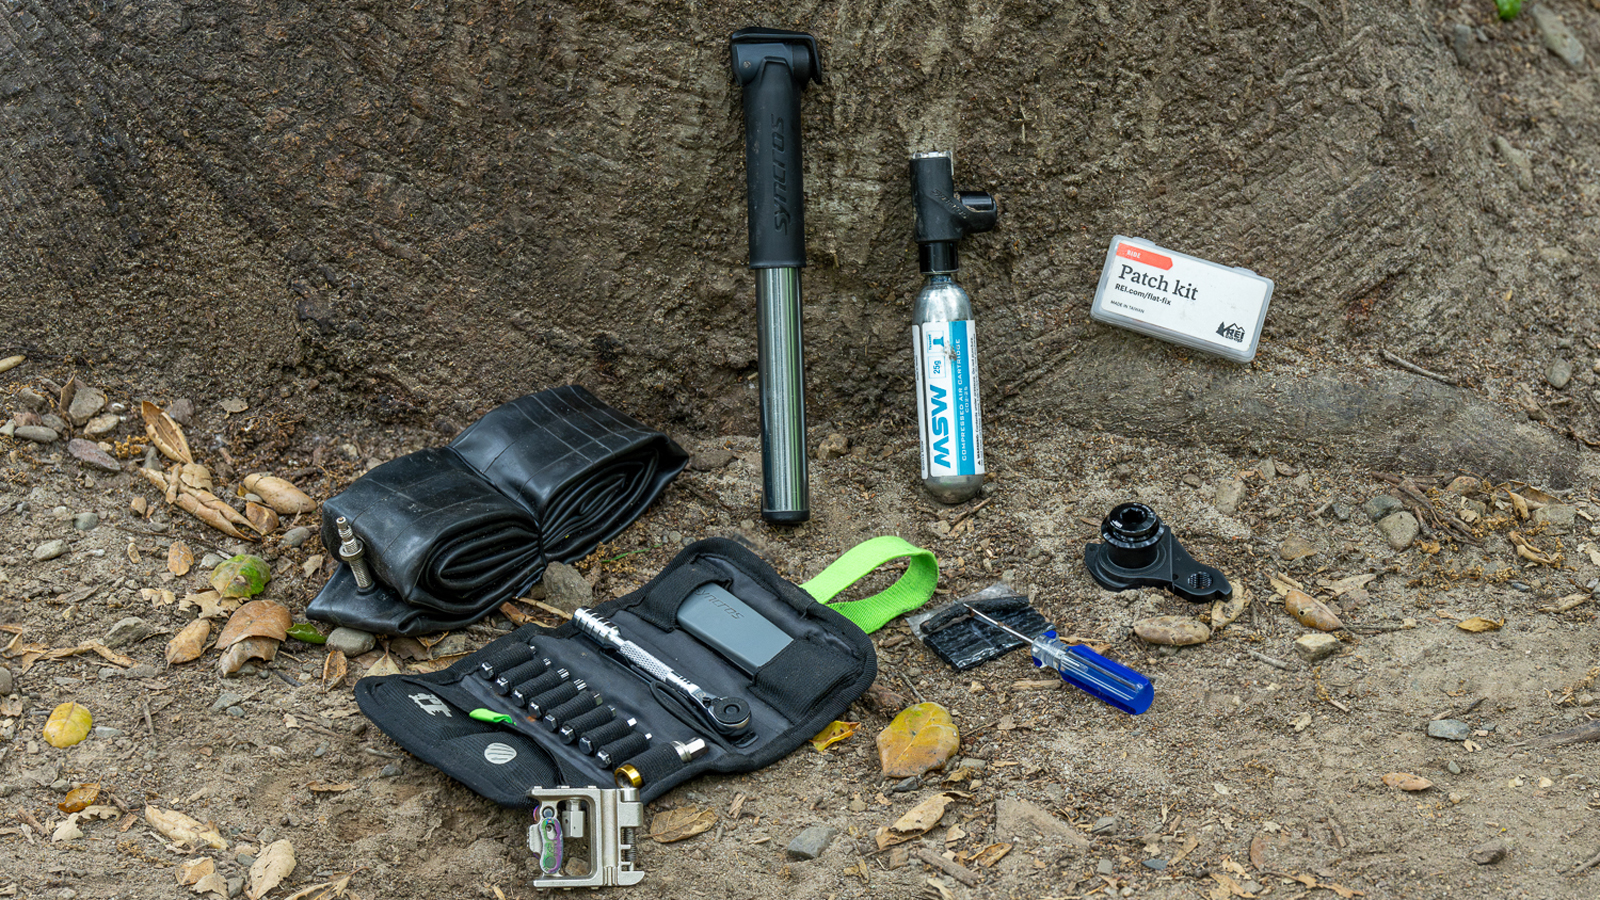
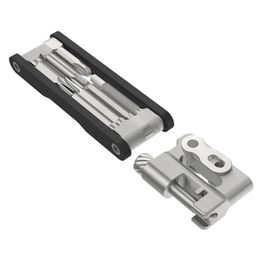
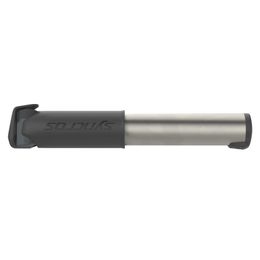
Next up, check your mountain bike repair kit. Here’s what you will need:
• Tubeless plugkit,Tubeless Handlebar ToolorInserts Tubeless
• A spare tube
• Tire Levers
• CO2 cartridge and/or a mini-pump
• Patch kit
• Spare derailleur hanger
• Quick link adapted to your chain
• Multi-tool that includes a chain-tool and a spoke key
In a previous article, we also listed some accessories to equip your bike, such as bottle cages with integrated multi-tools, computer mounts and fenders.Check them out here
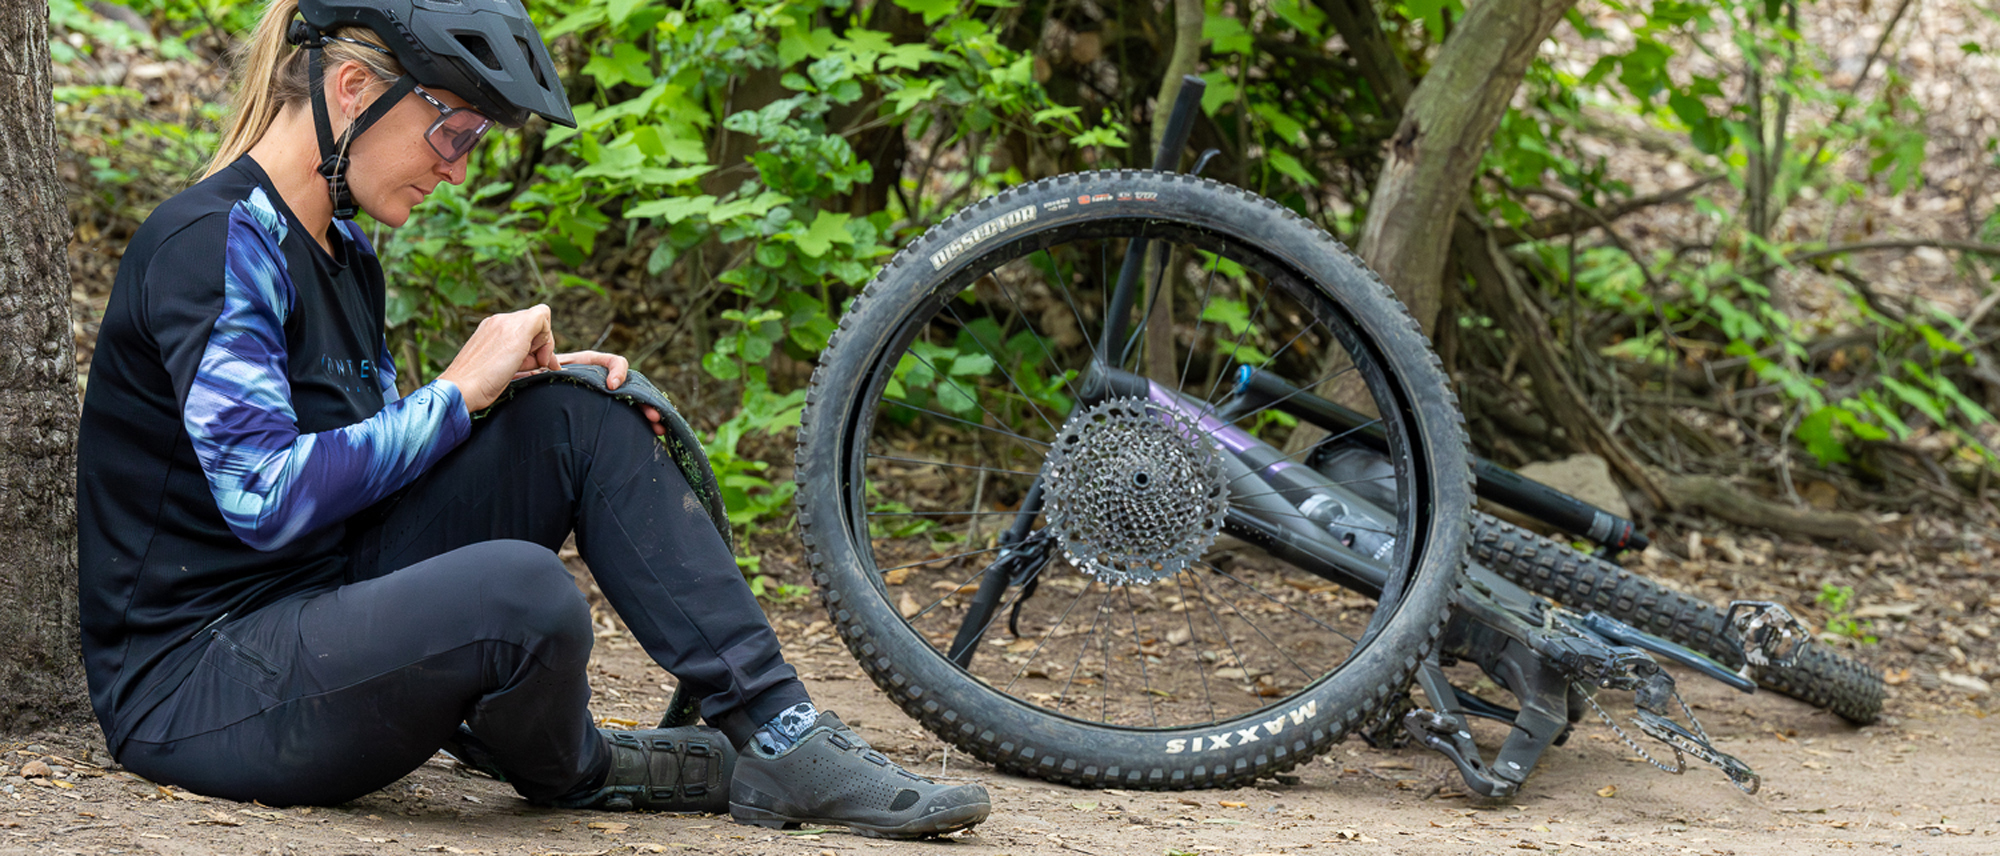
Now that you have everything you need, let’s start fixing that bike! First things first, make sure that you are in a safe spot, off the trail and comfortable enough to work around your bike. Ok, let’s get to it.
How to fix a tubeless tire using a plug
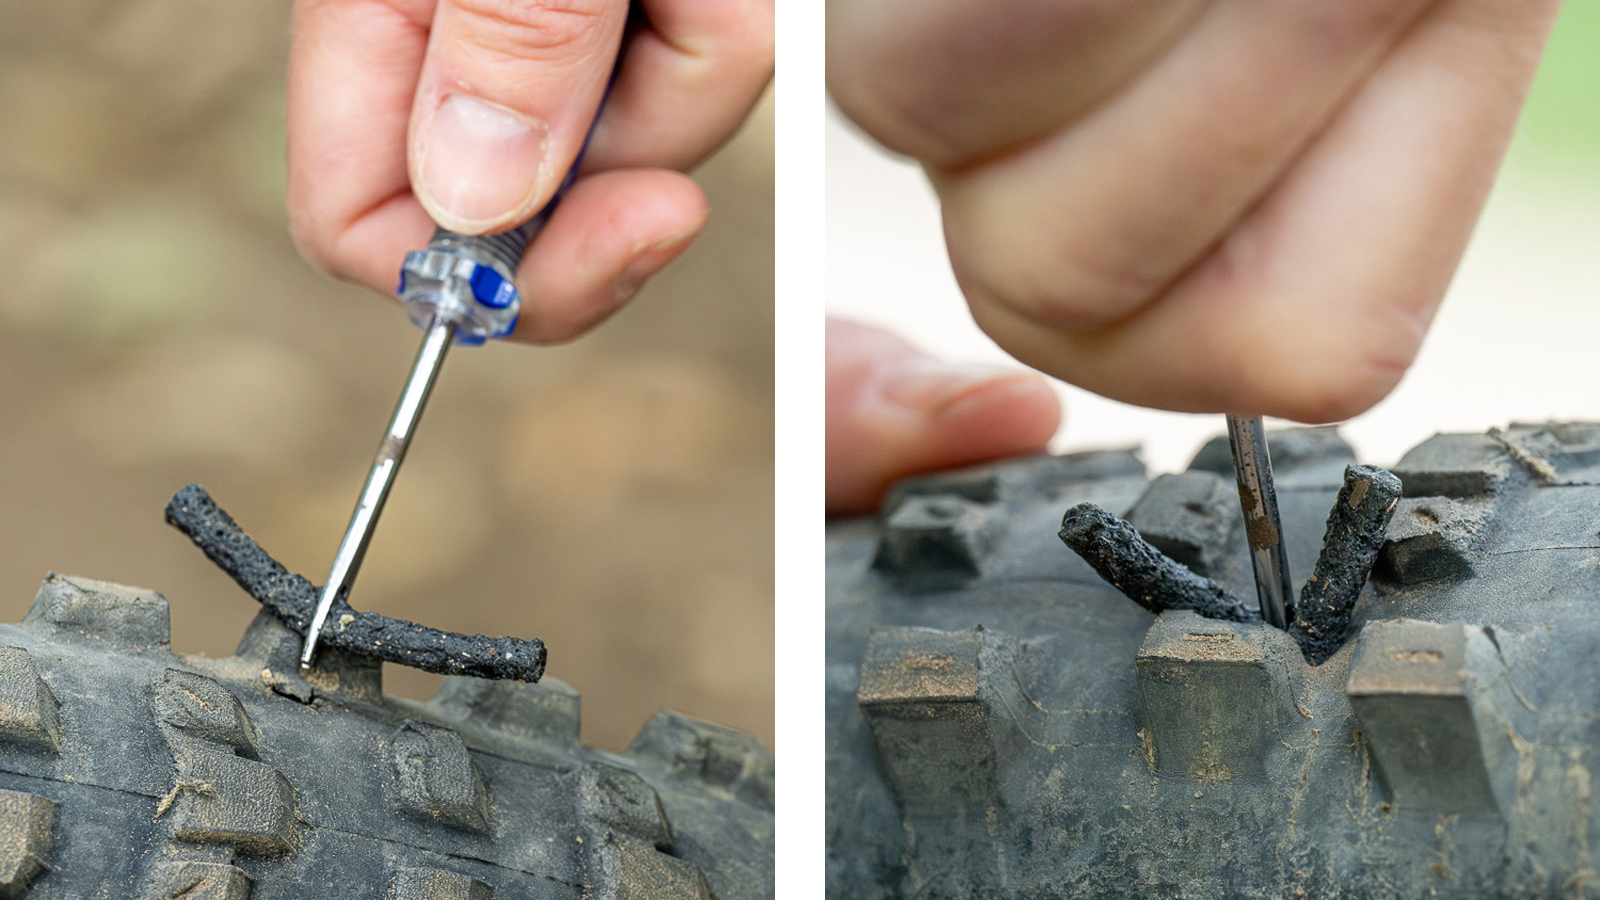
The dreaded flat tire… Probably the most common issue that you’ll encounter on the trail. Riding tubeless tires is the best way to minimize punctures, but every now and then you might roll over a sharp rock that creates a hole just too big for your sealant to fill it. Stop as soon as possible, in a safe spot off the trail. Inspect your tire to find the hole, then pull out your tubeless plug.
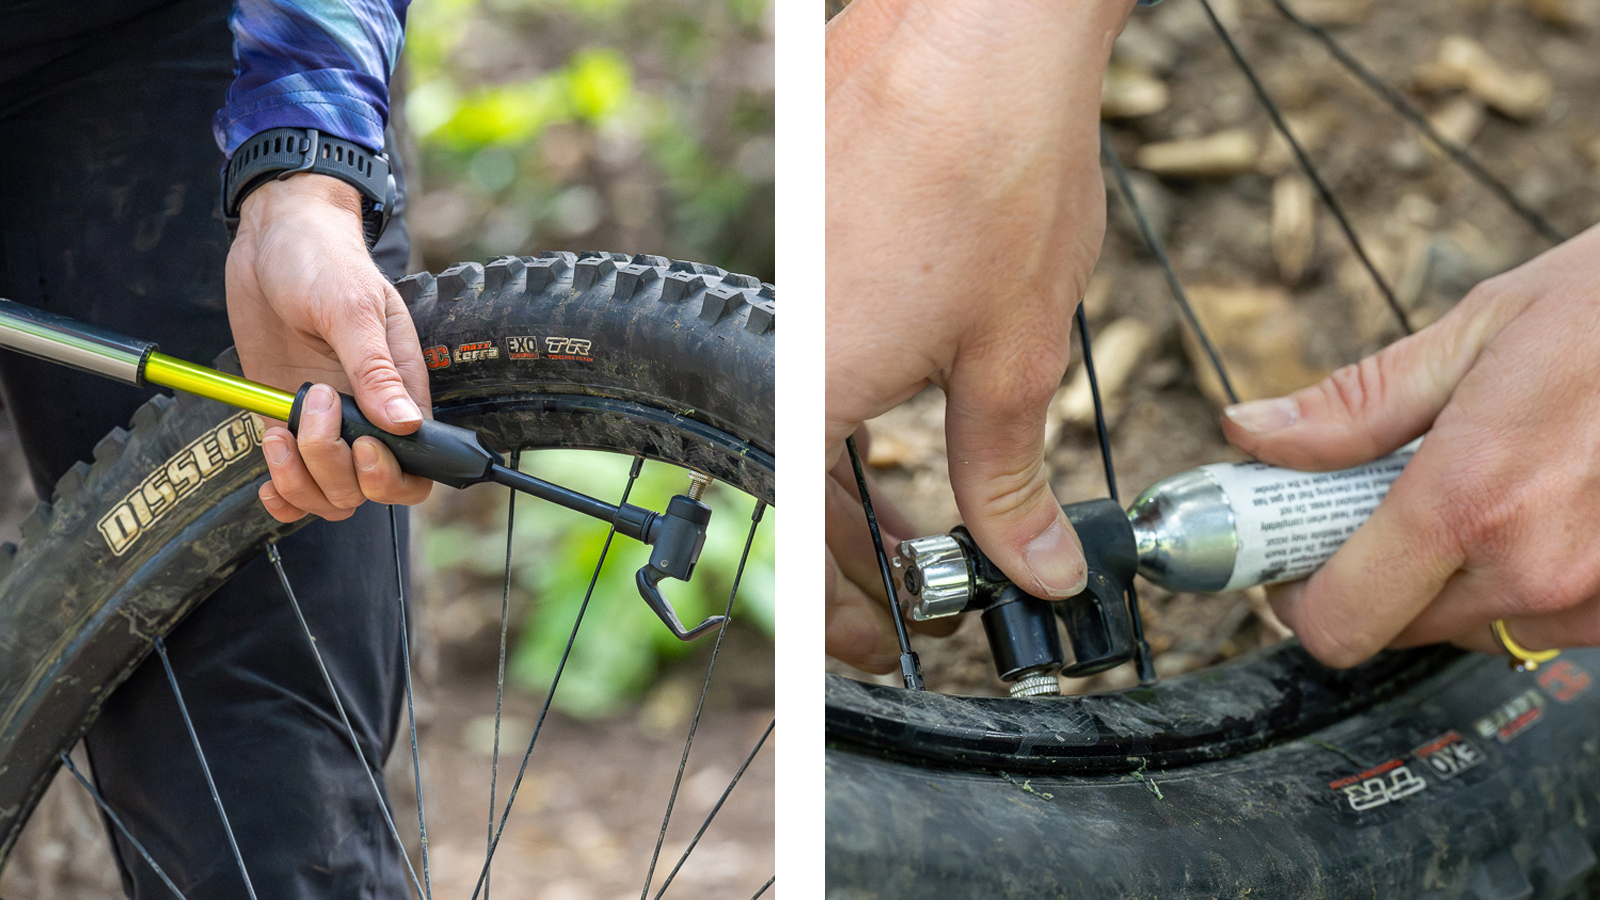
My tip is to always have the needle ready with a plug, that way you can act fast. Some plugs are super hard to thread through the needle, so it’s better to prepare it at home, when you are not in a rush. Push the needle in the hole, far enough so that the middle part of the plug goes through and fills the hole. Don’t be afraid to push pretty hard through the tire. Once the plug is set, remove the setting tool carefully, making sure the plug stays in the tire. Reinflate the tire using a CO2 cartridge or a mini-pump and enjoy the rest of your ride!
You can keep using a plugged tire for several rides. I personally do it all the time, especially if my tire was brand new. Simply keep an eye on the repair and make sure that the tire is still sealed. If you lost a lot a sealant during that mishap, be sure to add some as soon as you get home. However, if you are planning to race or going on a longer epic ride, I would replace the tire, to eliminate that risk factor and to enjoy the performance of an intact tire.
How to install or replace a tube
Now, what if you are not riding tubeless tires, if you ran out of plugs or if for whatever reason you simply can’t make the plug fix work? Well, you will have to install that spare tube that you brought.
Start by taking off your wheel. If it’s the back wheel, don’t forget to shift down onto the smallest cog to make it easier to remove the wheel. Some derailleurs have a little pushbutton to keep the derailleur down and release the tension from the chain, making it even easier.
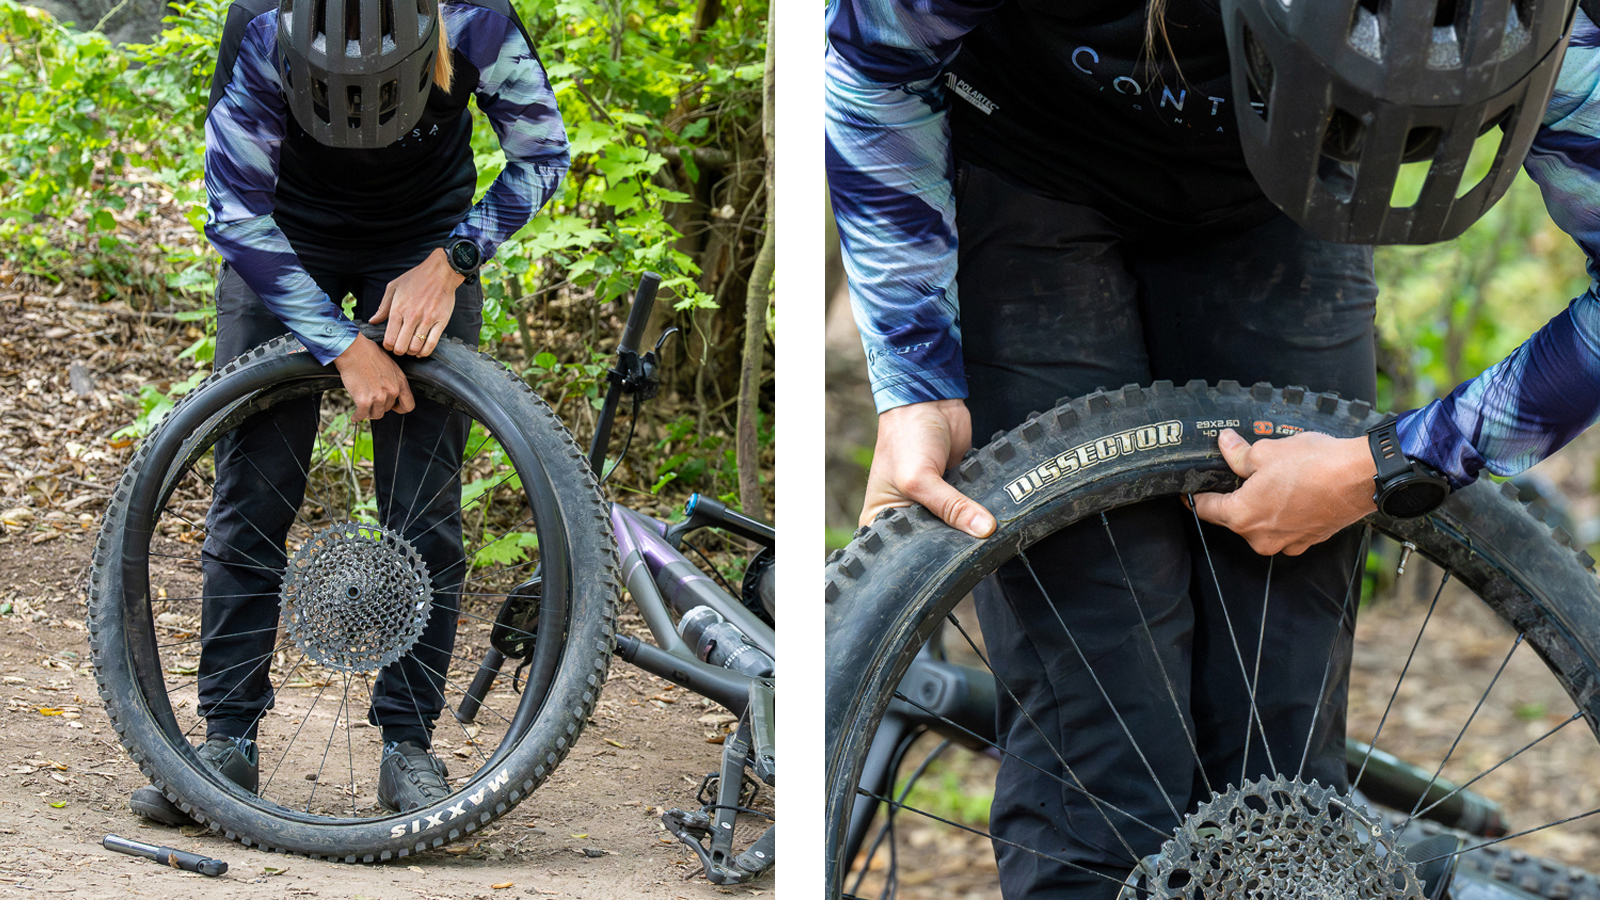
Once your wheel is off the bike, start removing the tire from the rim by pushing the tire towards the center of the rim. You only have to remove one side of the tire. Remove the old tube and inspect the inside of the tire for anything sharp that might puncture the new tube.
If your tire was tubeless before, this might be a little messy due to the sealant in the tire. It is what it is, mountain biking can get messy!
Pull out the new tube and inflate it just enough so that it takes its round shape. Remove the tubeless valve if there was one and place the new tube around the rim, then put the tire back on the rim, starting from the side opposite to the valve and being careful not to pinch the tube.
Depending on the flexibility of your tire, your type of rim and your own hands’ strength, you might or might not need tire levers.
Once the tire is back in place, finish inflating it and make sure it sits nicely in the rim. You can check this by looking at the thin line running around the tire wall just above the rim. If you can see that line all around the wheel, you’re good. Otherwise, you’ll need to inflate the tire a little more to help it “pop” into place.
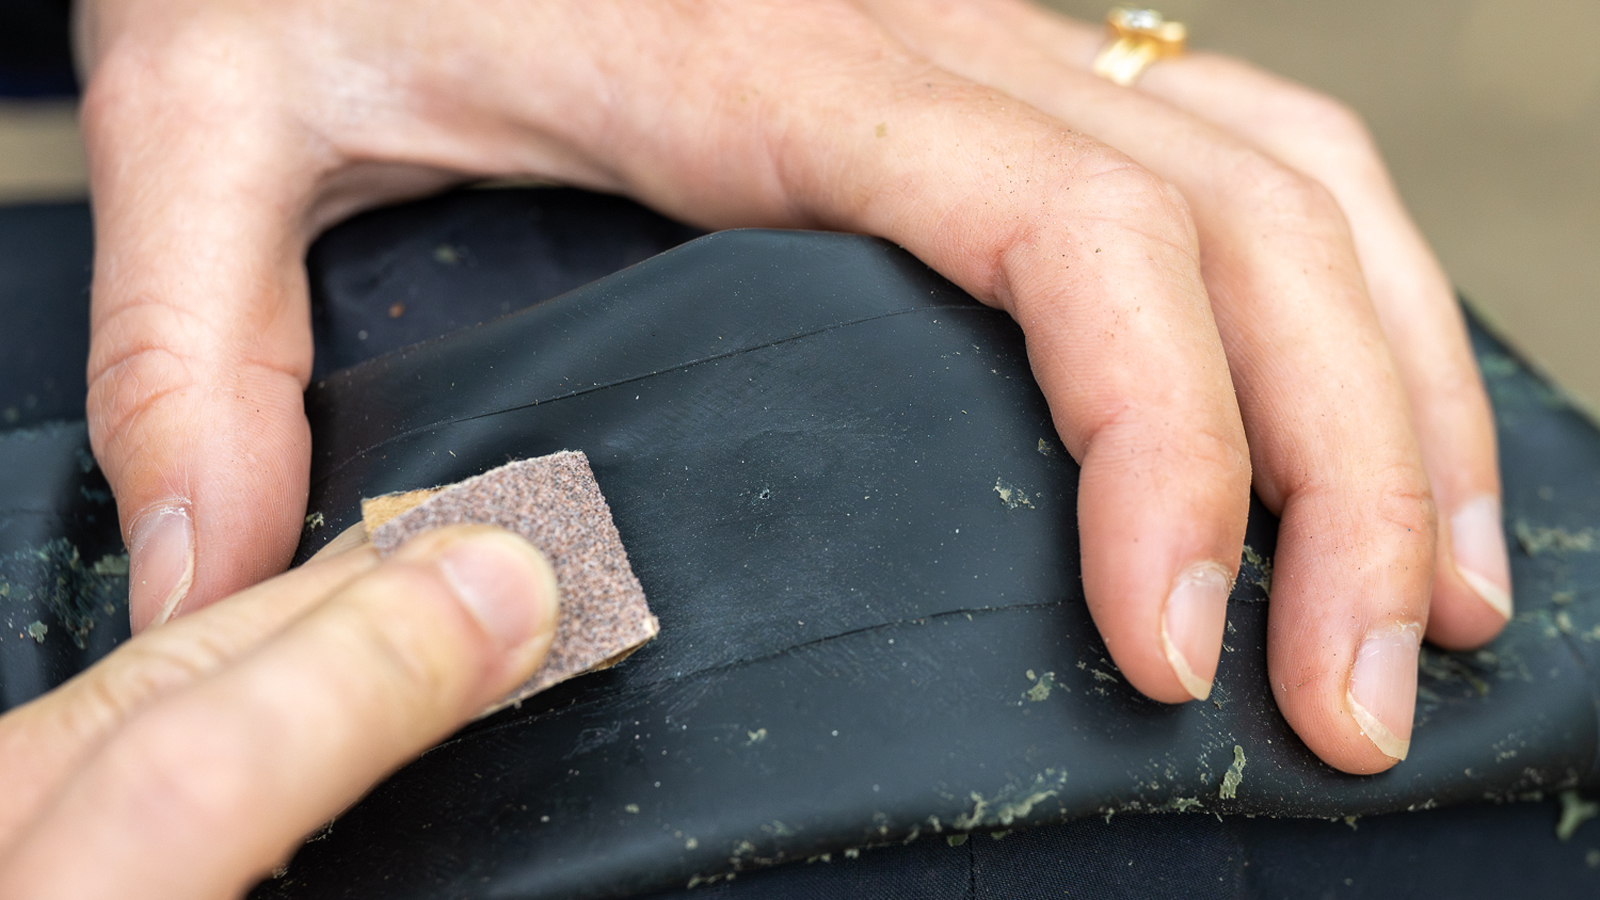
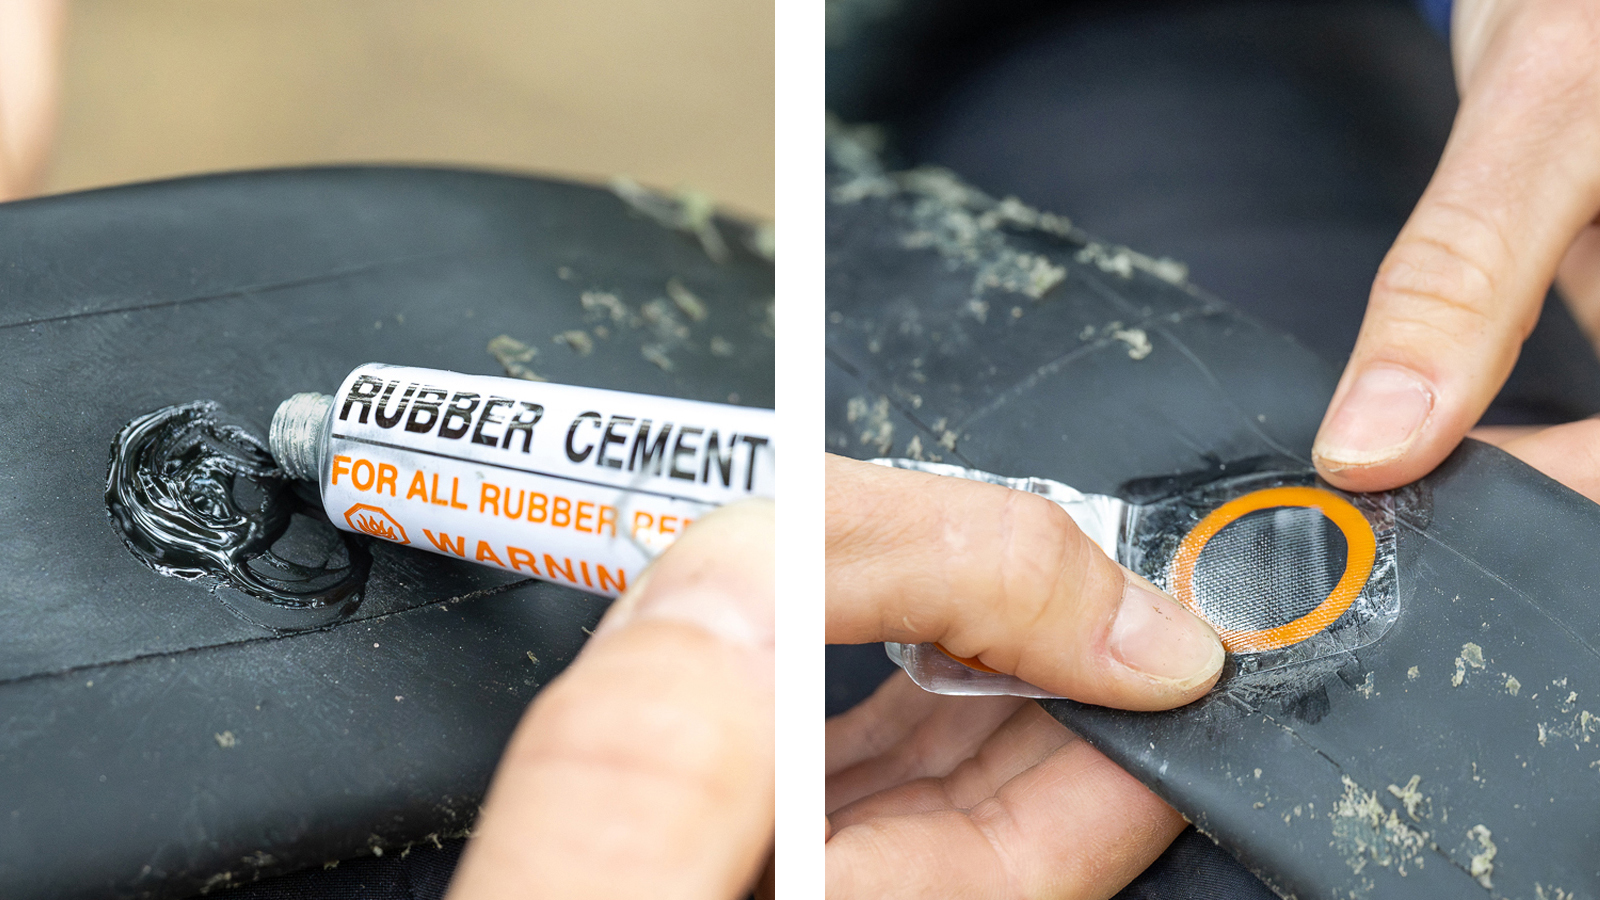
How to use a patch kit to repair a tube
So you’re really running out of luck today. You installed that new tube but you just got another flat. Maybe it’s time to call it a day… but maybe you’re still pretty far away from the end of the trail. In that case, a patch kit can save your ride!
Remove your wheel and tire following the steps detailed above. Take out the damaged tube and look for the hole responsible for the flat. Clean the area around the puncture and use the small piece of sandpaper to rough it up. This will help the patch stick better.
Apply the glue over a surface just a little wider than the patch or skip this step if you are using a glue-less patch. Stick the patch on the hole and press it down for a minute, until it completely sticks to the tube. Now go back to the above steps explaining how to install a new tube and hopefully you won’t get any more flats on that ride!
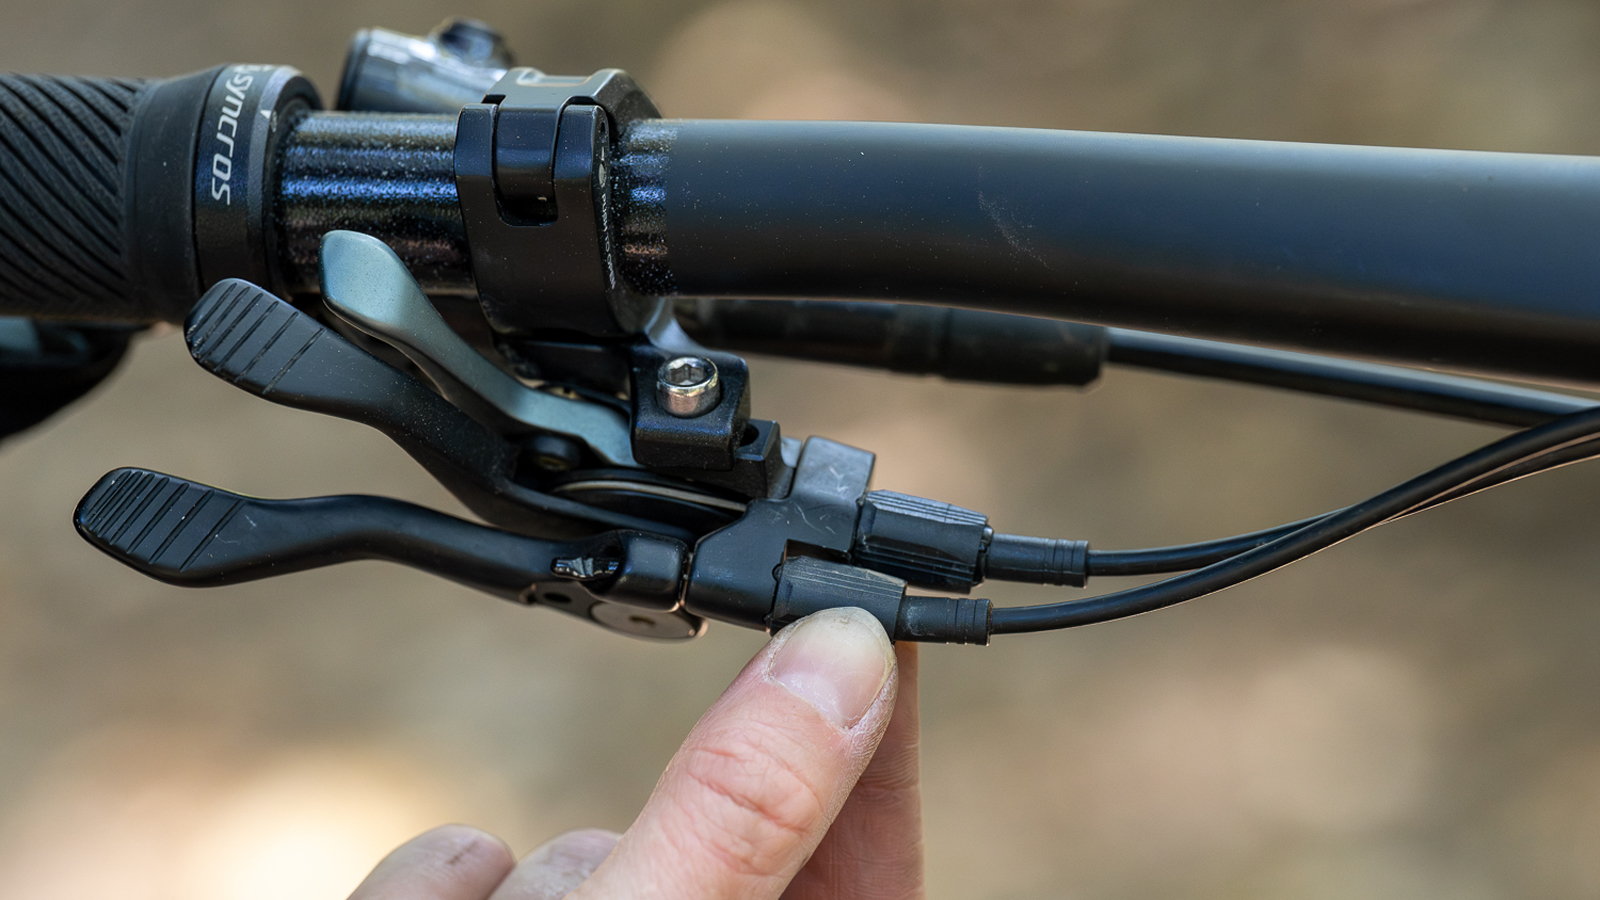
How to adjust your derailleur cable and/or dropper post cable tension
We’ve gone over this in our previous article about the pre-ride check , but it can happen that your gears start acting weird during a ride.
First, check that the bolt holding your rear derailleur is tight, as it can sometimes loosen. Then, if you have mechanical shifting, the next thing to check is your cable tension. If the higher gears (small cogs) don’t run smooth, release the cable tension a little bit by turning the barrel adjuster clockwise.
Or if the chain doesn’t run on the lower gears (big cogs), increase the cable tension by turning the barrel adjuster counterclockwise. The same goes for your mechanical dropper post.
If you are activating the lever and nothing happens or your saddle comes back up slowly, add some tension to the cable (counterclockwise). If on the contrary your dropper post moves down when you sit on your saddle without activating the lever, you need to release cable tension (clockwise).
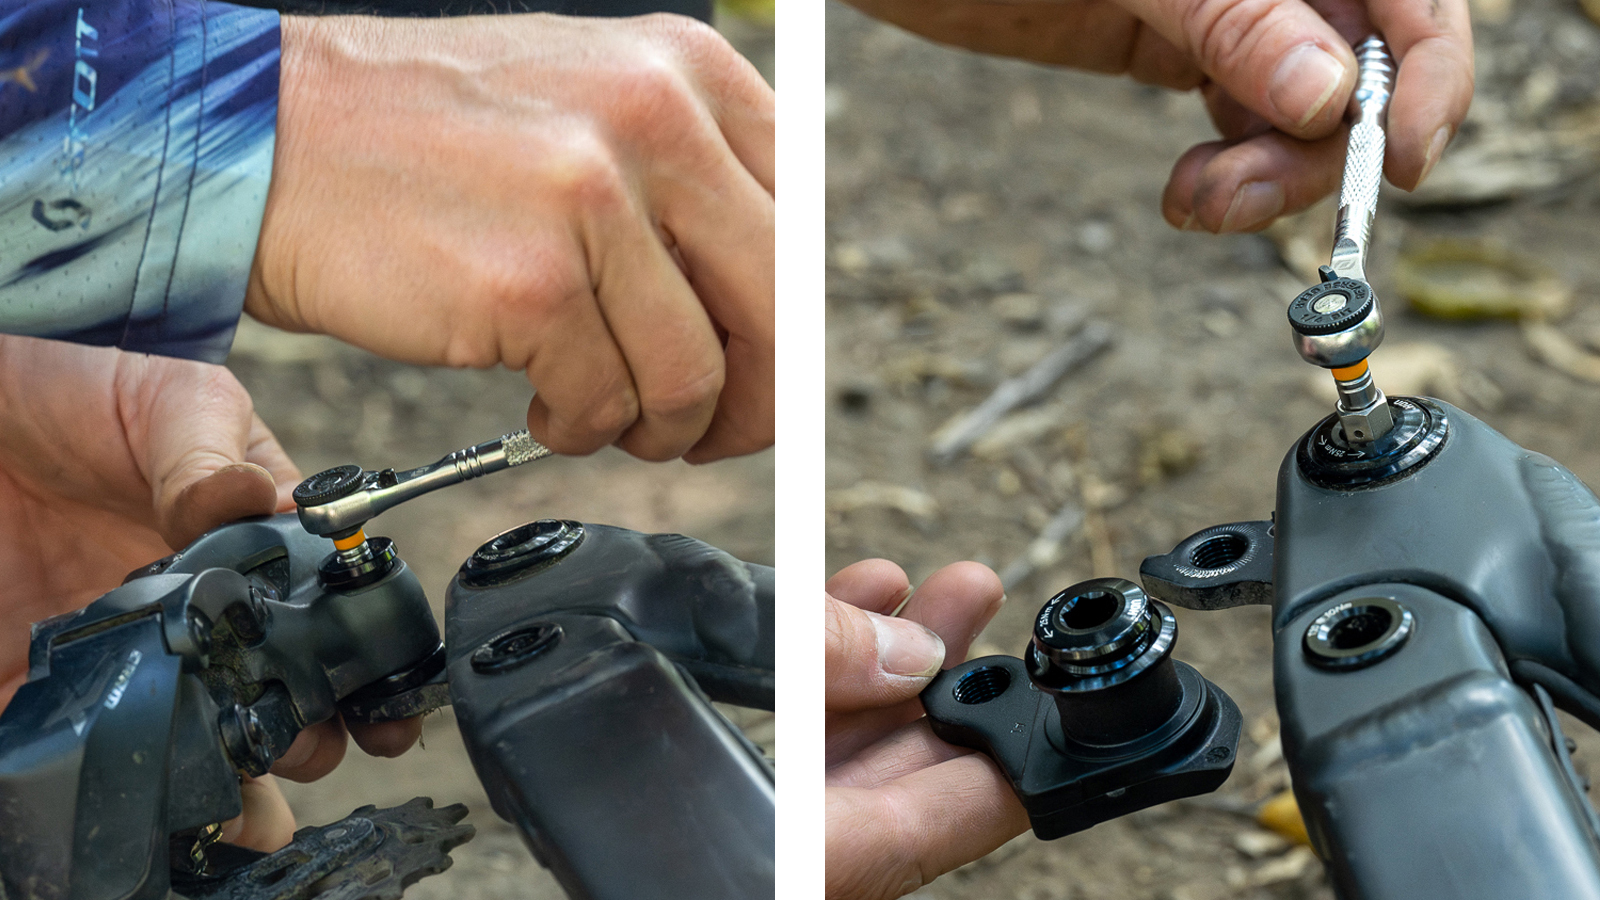
How to replace a derailleur hanger
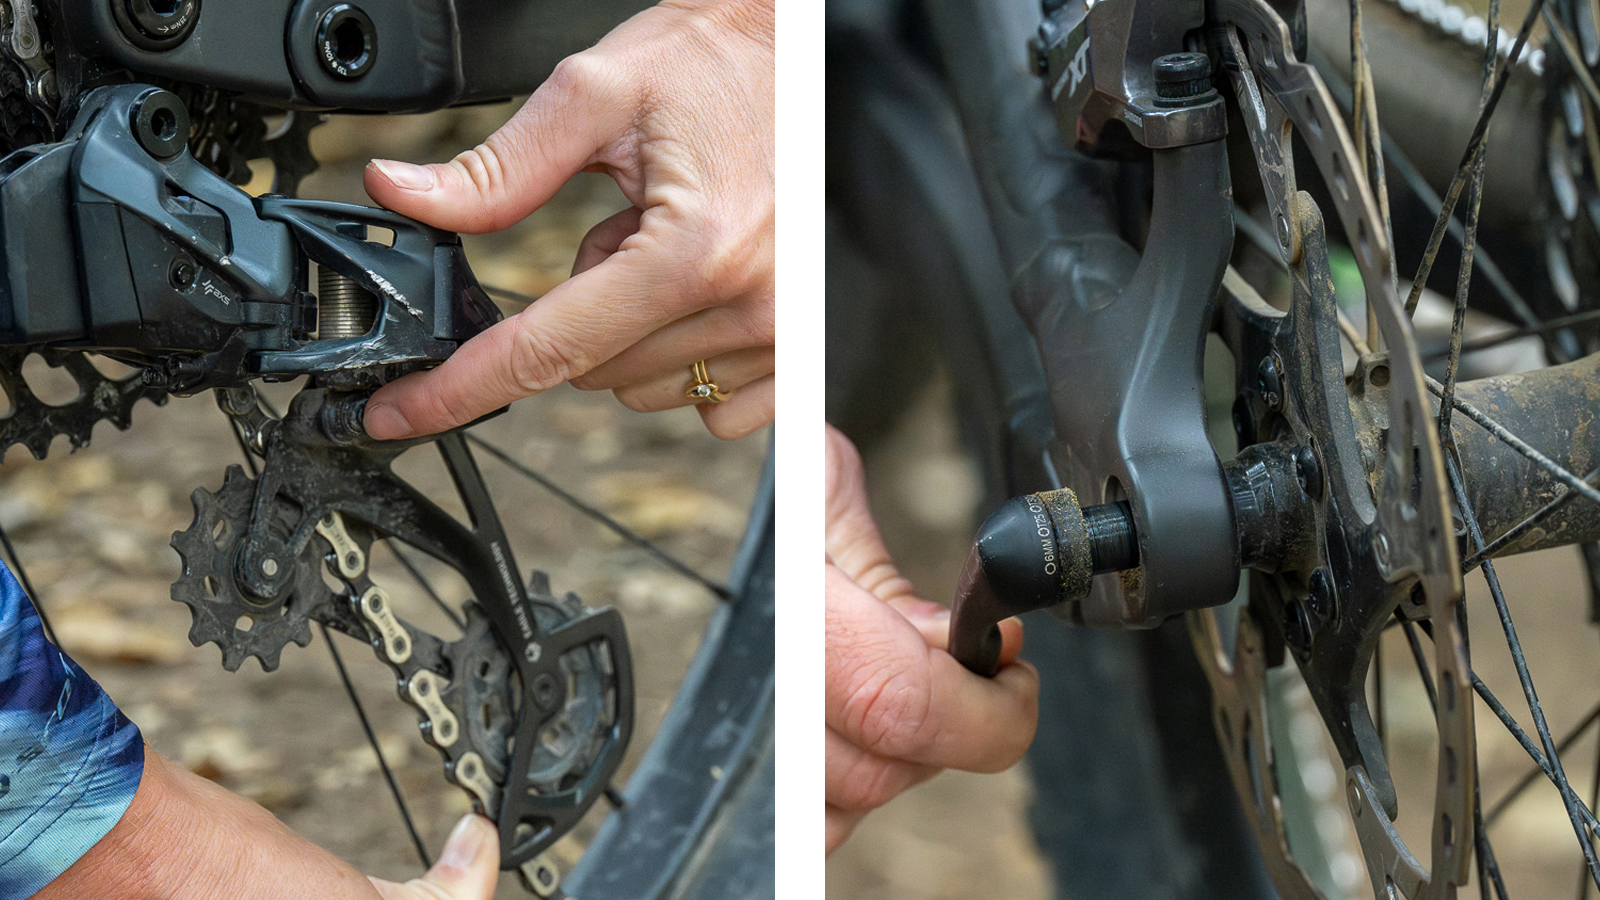
If your derailleur is tight and you’ve checked the cable tension (or you don’t have a cable to check because you have electronic shifting), then your shifting issues might be coming from a bent rear derailleur.
This can typically happen if you crash, drop your bike or hit a rock on the derailleur side. Having a spare derailleur hanger is not expensive (sometimes they even come with the bike) and they are super easy to replace, especially the new Sram Universal Derailleur Hanger (UDH) which new SCOTT mountain bikes are equipped with. Simply remove your rear wheel, unscrew the derailleur, then unscrew the damaged derailleur hanger, loosening it clockwise (unlike most other bolts!).
The torque on that bolt is quite high, so this might require some strength. Replace it with the new derailleur hanger, making sure it is well seated in the frame. Screw your derailleur back on, checking that the derailleur tab fits together with the shape of the derailleur hanger. Put your wheel back on and verify your shifting. Hopefully this will have solved your issue so you can enjoy the rest of your ride.
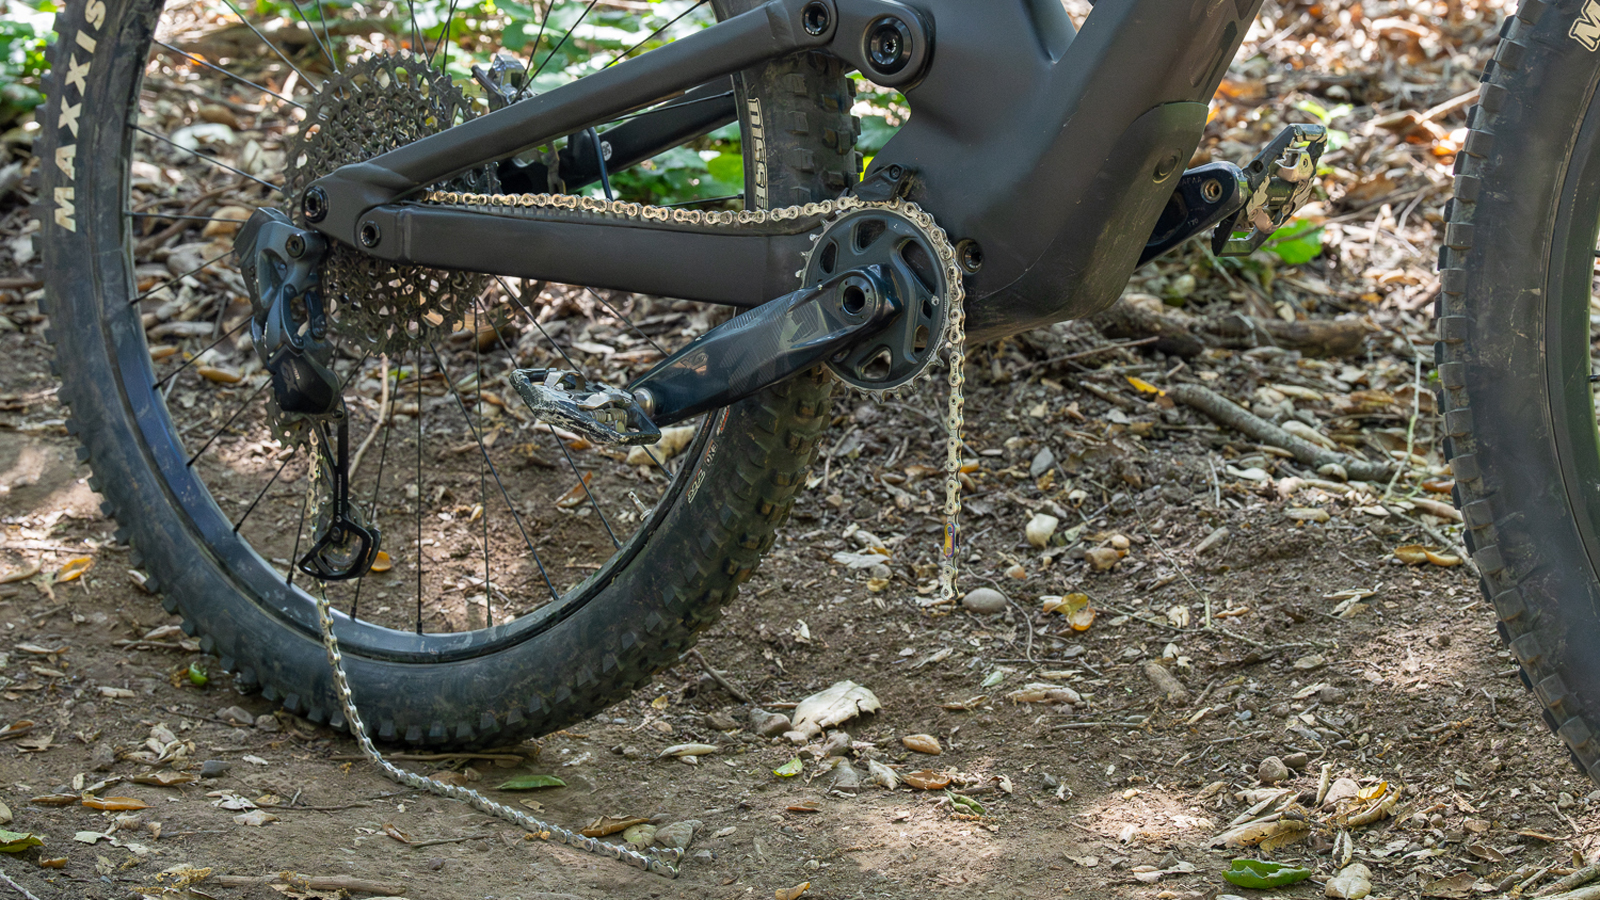
How to repair a chain using a quick link
Another common mechanical is a snapped chain. Don’t panic, this is pretty easy to fix with the right chain tool and correct quick link for your chain (the brand and the amount of speeds matter).
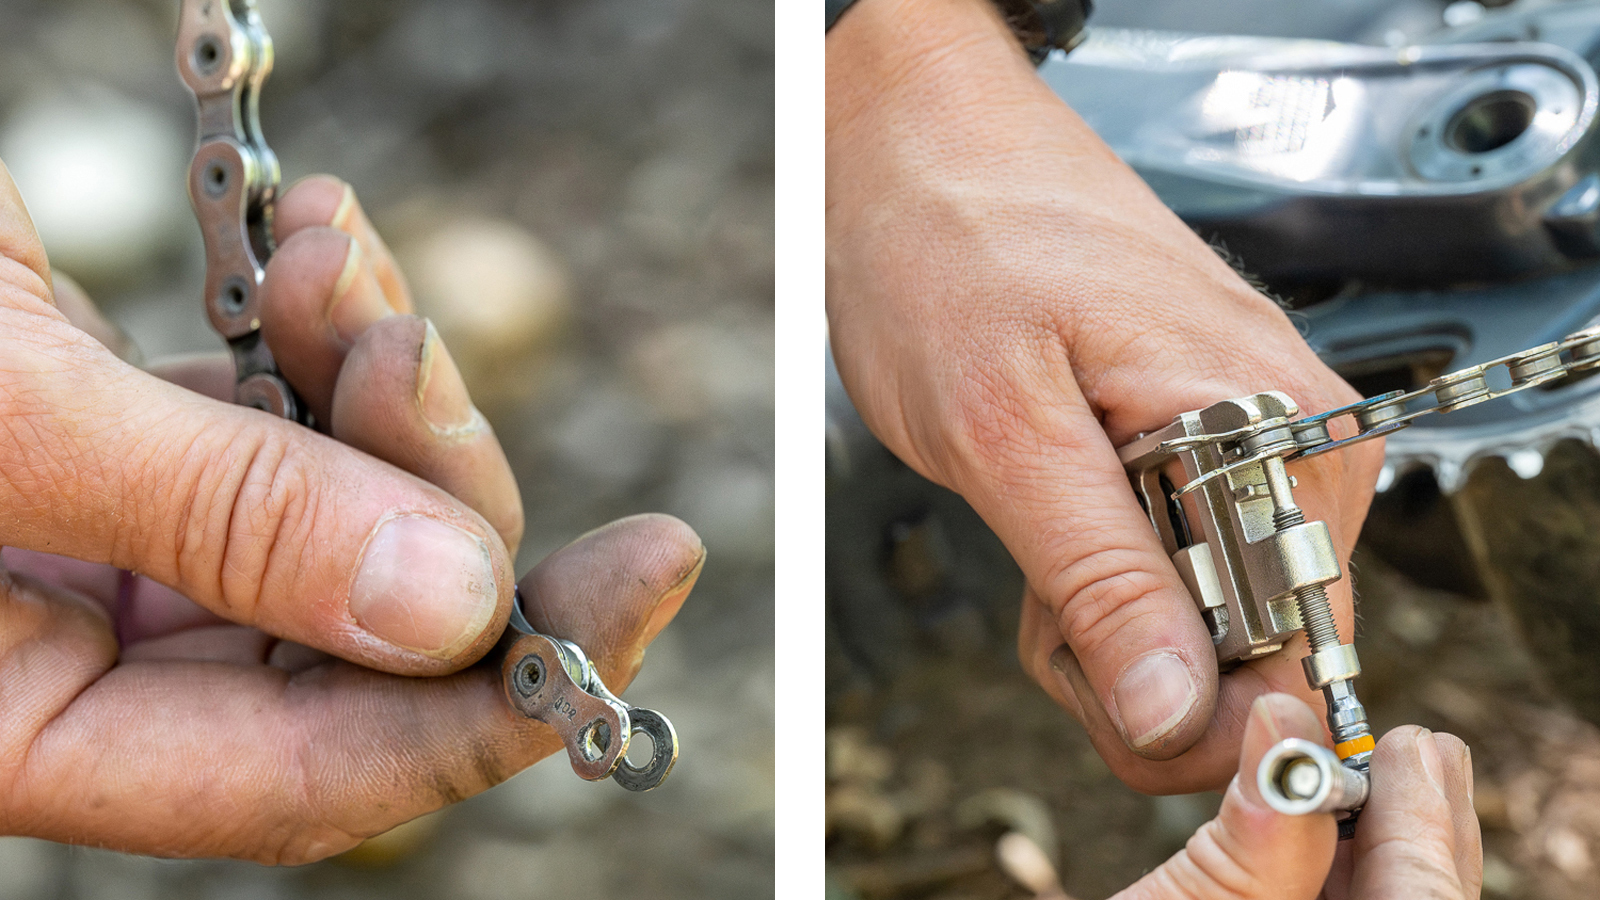
Before using the quick link, you need to remove the broken female link so that you have a male link on each end of the chain. To do so, place the damaged link in the chain tool with the pin you want to remove in line with the tool, so that when you screw the chain tool it will push the pin out and free the chain link. Again, this will require some strength but also good leverage, which is why having the right chain tool that offers efficient leverage makes all the difference.
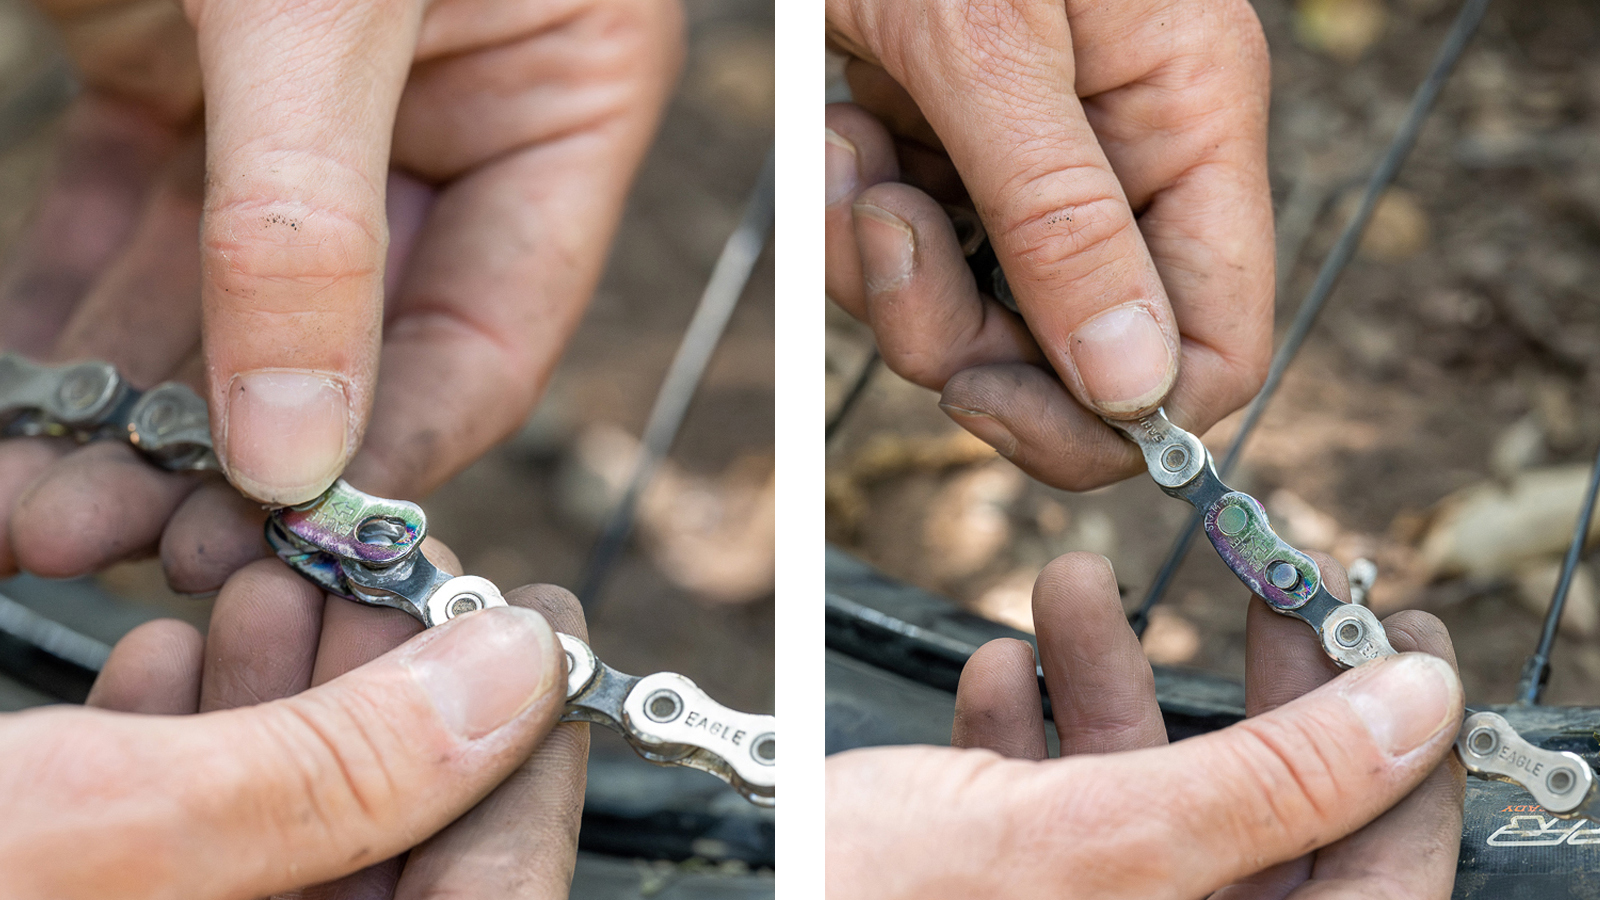
Once the broken link has been removed, you can replace it with the quick link to connect the chain again. Pay attention to the little arrow on the link and make sure it points towards the pedaling direction.
Pull on both sides of the link to lock it into place. You will probably only get halfway, so you will have to cycle the chain until the quick link is on the upper section of the chain, above the chain stay. Then put some weight on the pedals to tension the chain. You should hear a little click when the link fully locks. Have a look at it to make sure it’s nicely in place, then go back to your ride!
How to tighten a loose spoke
If you notice that your wheel is wobbly and moves laterally, you probably have at least one loose spoke. You could probably roll carefully back home like this, but in some cases your tire might be rubbing against your frame and this could cause more damage.
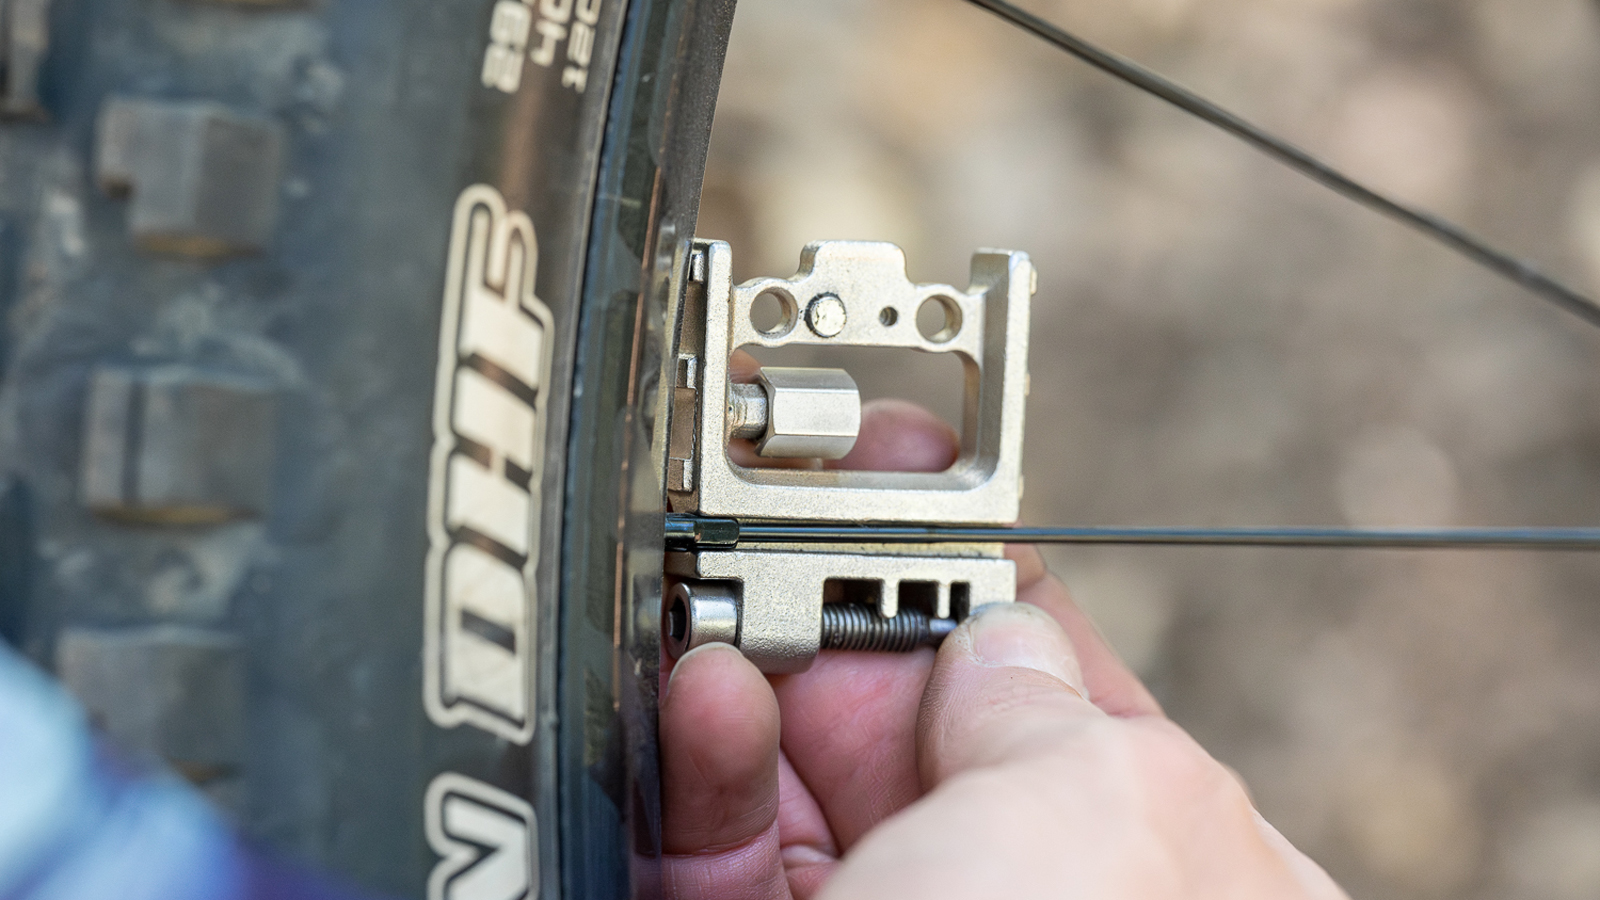
Since tightening a loose spoke is a relatively easy fix, we recommend adding this one to your trailside repair skills. Check the tension of each spoke by squeezing them together with your hand two by two first on one side of the wheel, then on the other side. Once you’ve identified the loose one, pull out your spoke key and tighten it back gently, turning the key counterclockwise. Proceed carefully and don’t over-tighten the spoke or it will create another tension imbalance instead of fixing the issue. Hopefully your wheel is now true enough to finish the ride!
A few more tips…
Practice those repairs as much as you can! Obviously, you don’t want to break something on purpose so you can learn how to fix it, so the best way to get to practice these is to do it yourself whenever it happens to you. Don’t let your friends do it for you, because they might not always be there. Rather than letting them fix your bike for you, ask them if they can supervise or simply double-check your work once you are done.
Finally, if you had any kind of mechanical issue during your ride, thoroughly check your bike once you get home and if you are unsure of anything, go to your local bike shop to get it checked and repaired properly. They are here to help you with their expertise so you can keep riding your beloved bike for a long time.
Text: Sarah Didier / @labelibula
Photo crédits: Monica Hammond