We have a more suitable website version for you. Please confirm your country to get the right product availibility and even purchase online.
Ask 'Tessa

Whatever the bike you are riding or planning to ride, and whether you’ve just bought it or have been riding it for a while, there are many ways to improve its performance and comfort. Read further to find my tips for adjusting your bike properly.

Of course, any good bike dealer will set up your bike for you in the shop when you get your new bike. Maybe she/he even works with a bike-fitting program, which will help her/him find the best customized set-up for you. But it’s always good to know a few basics so that first of all you know how your bike works and secondly you know how to (re)adjust it yourself if needed.

Today we are setting up our Contessa Spark 900 trail bike but these tips also apply for for road and gravel bikes too.

OK, let's get started!

Back to top


Pedals

1 Your pedals are not the same! Check for a ‘L’ and ‘R’ symbol for Left and Right. The Right pedal goes on the same side as the chain, and the Left pedal on the side without the chain.

2 First things first: screw in your pedals. Start with your right pedal. You right pedal screws in clockwise, tightening to the right and losing to the left. Caution! The thread on your left pedal is reversed! It tightens counter-clockwise- turning it to the right to loosen and left to tighten.

Tip! Start at Home

You will probably see a lot of people doing all kind of adjustments and settings alongside the trail or on the parking lot. My recommendation is that it’s always better to take the time to do it at home, without any stress, especially if it’s the first time you go through the process. You can do this on your own, but the best way to do it is to ask someone to help you so that she/he can hold you on your bike while you are setting it up. And that’s also a good excuse to hang out and talk about bikes – just in case you were looking for one…


Saddle

There are 3 things to check when adjusting your saddle:
the height, the horizontal position and the angle.

How do I define my saddle’s height?

To define the right saddle height, 1 sit on your bike with your heel (in cycling shoes!) on the pedal placed at its lowest point, but aligned with the seat post (so slightly inclined).

Your leg should not be completely tensed. Pedal a few spins backwards and see if your hips are moving or if they are stable. 2 If your hips are moving up and down, your saddle is probably too high. Go down a little and test again.

Too Low!

Too High! When your seat is too high, your hips will move up and down to compromise.

How do I define my saddle’s horizontal position?

As a general rule, you want your front leg’s knee to be vertically aligned with your pedal axis when your pedals are in a horizontal position (you can check this by attaching a weight on a string and letting it hang from your knee).

What do you need? 1 A shoelace and a weight.

A saddle that sits too far forward causes pain in the knees while a saddle that sits too far back overloads the calf muscles. Sometimes, the general rule doesn’t work for everyone, so do not hesitate to move your saddle forwards or backwards until you find the spot in which YOU feel the most comfortable. Be careful to only do very small adjustments at a time (a tiny change usually makes a big difference) and try to stay within the recommended range given on the saddle’s rails.

2 Place the string in line with your knee

Seat too far back.

Seat too far forward.

Just right.

Should my saddle be pointing up or down?

1 You can check the angle of your seat with a bubble level. If your saddle points too far down, you will slide forward and there will be too much pressure exerted on the bottom of your palms. On the other hand, if your saddle points too far up, it can cause uncomfortable pressure in the crotch. In general, it is better to have it perfectly horizontal for best allocation of your body weight. Although in the end it is up to the individual to decide! So again, do not hesitate to try different adjustments until you feel completely comfortable sitting on your bike.


Handlebar

This is where (obviously) mountain bikes are quite different to road/gravel bikes. If you are a road or gravel biker, you want to make sure your handlebars are at the right height. Whereas if you are a mountain biker, you’ll want to focus on having your shifters and levers placed correctly.

Should I adjust my handlebars’ height?

The person building up your bike will most probably ask you how high you would like your handlebars to be (notice the different steerer tube spacers placed above and/or below your stem). If you are new to cycling, I would recommend to start with the highest position. This will put you in the most relaxed seated position. Once you gain confidence over the season, you can adjust your position. Try a lower, more aggressive position by removing one or more spacers. Remember: it’s always better to go step-by-step, making small adjustments at a time. If you start feeling lower back pain, you’ve probably gone too low.

How to Adjust your Handlebar

1 Loosen your stem

2 Loosen the top cap

3 Remove the bar and remove or add spacers above or below your bar as needed

4 Place the top cap back on tighten

5 Align your bar

6 Tighten your Stem

I’m a mountain biker… where should my shifters and levers be placed?

Lever Distance from Bar

When riding your bike, your hands should be placed towards the end of your handlebars in order to be the most stable. Sit on your bike and start moving your brake levers in- or outwards so that you can use them with just one finger.

Example of Lever too far from bar.

Hydraulic brakes are incredibly powerful, that’s why you should always only use one finger.

Lever Height

Then move the levers up or down to find a comfortable position in which your wrists are as straight as possible. To do so, ask your friend to hold your bike and get into the standing riding position, since this is the position in which you will be more likely to use your brakes.

Brake levels too high.

Brake levels too low.

Just right.

Reach

Once your brakes are properly placed, you can adjust your other levers (shifter, dropper post, TwinLoc). You want to be able to reach them easily, without having to move your palms.

Lever too far away.

Just right.


Tires

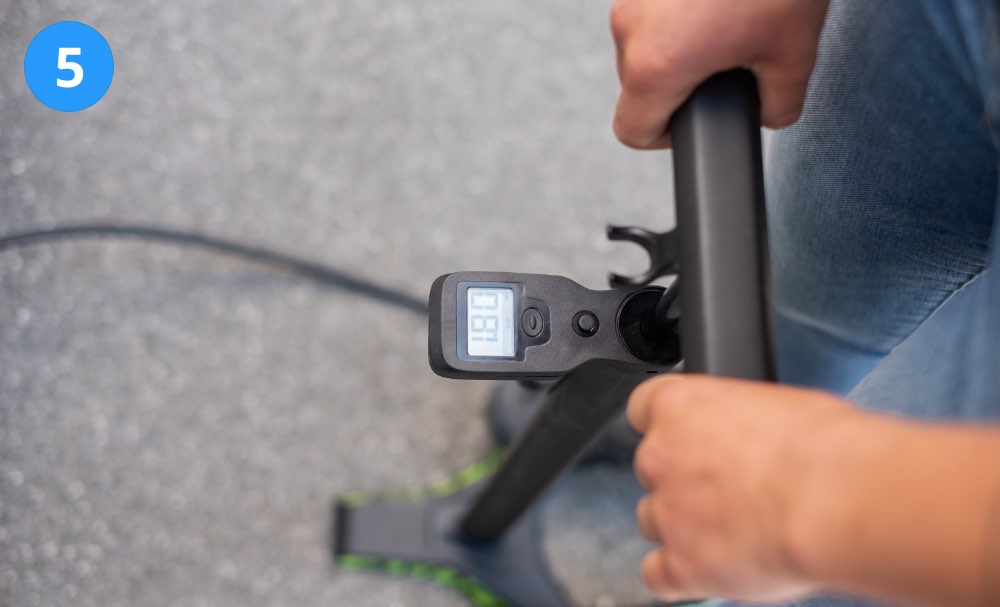
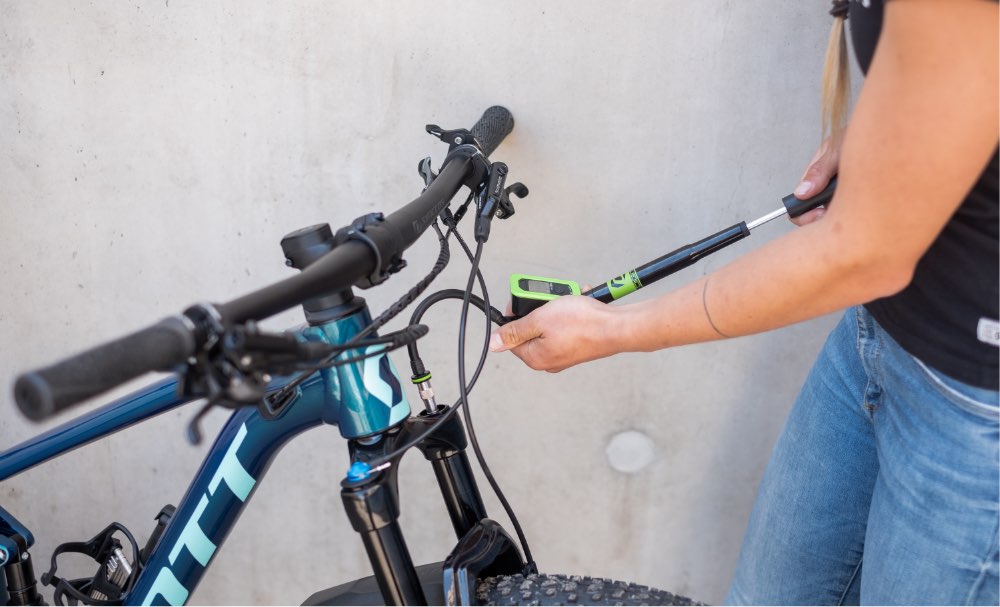
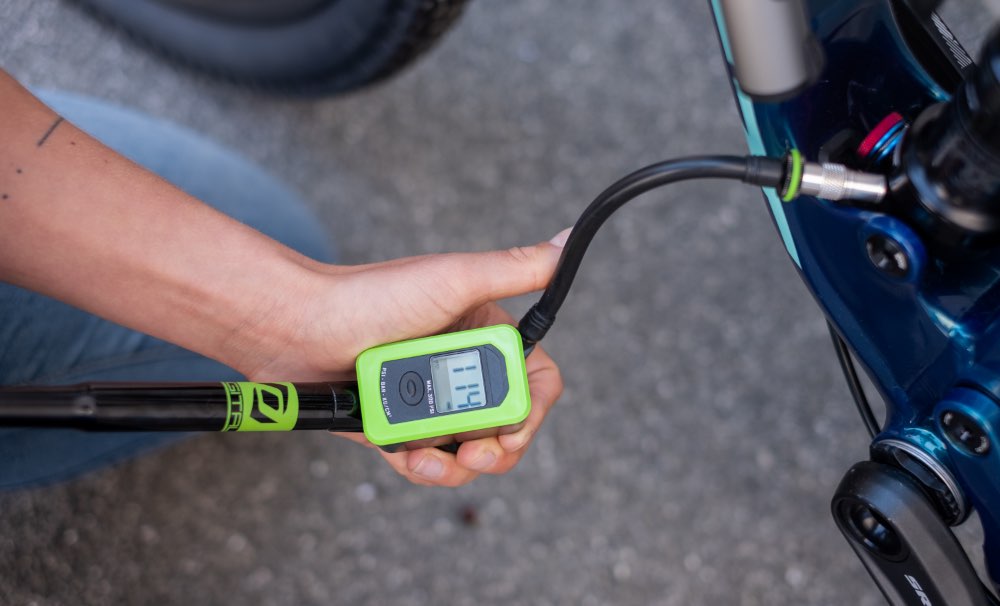
Before anything, you have to know that tire pressure needs to be checked regularly. It’s not something you set-up once and for all. All tires lose a bit of air over time so you always have to check your pressure before going for a ride. You might also want to adapt your tire pressure according to your ride, especially in you are riding a mountain bike or a gravel bike (you will learn more about this in the sections below).

Mountain Bike

Gravel

INFLATING YOUR TIRES

Check your tire pressure using a floor pump (they usually all have a gauge) or use a tire pressure gauge.

1 Unscrew cap

2 Cap open. Pressing down will release air

3 Place pump over valve

4 Pull up knob on pump to lock onto valve

5 1.8 Bars is a good pressure to start at for mountain bike tires

6 Release Valve

7 Close tire valve

How much pressure should I put in my tires?

There are 3 things to take into account when defining your tire pressure: the tires themselves, your own weight, the terrain/surface on which you’ll be riding.

Type of tire: Wider tires need less pressure than narrow tires. The pressure range (min-max) recommended by the manufacturer is always written on the tire’s sidewall. Try to stay within this range.

Your weight: The lighter you are, the lower your tire pressure should be.

Terrain: Depending on what you are planning to ride, you can adapt your tire pressure to make your bike more efficient. This is especially true if you are riding a mountain bike or a gravel bike: wet, loose or technical terrain (rooty, rocky) will require a lower pressure, whereas dry, hard-packed trails enable you to ride higher pressure.

Try different pressures over the season, until you figure out what feels best for you, but always stay within the recommended range and proceed with small changes at a time.

Too hard will leave the trail feeling rough.

Too soft will make it harder to pedal and leave you with more flat tires.

In reality, how will my tire pressure affect my riding?

Tires have the greatest influence on riding behavior, rolling resistance and safety. So you should definitely think about what you expect from your bike when defining your tire pressure. In the end, it’s a lot about finding the right compromise…

On a mountain bike: Lower pressure offers more traction and grip but too low pressure increases the risk of punctures and makes your bike less stable. On the other hand, higher pressure increases stability and rolling efficiency (for example if you are climbing on the road) but too high pressure makes for poor traction and grip on the trail and will have you bouncing around on rocky, technical sections.

On a road bike: A tire pressure that is too low will make your bike feel slow, whereas too much pressure will make it feel harsh.

On a gravel bike: If your tour is mainly going to be on gravel roads and maybe even take you on forest trails, then a slightly lower pressure will offer you more grip and comfort. If you’ll be riding a lot on asphalt, then a slightly higher pressure will offer you a better rolling efficiency and your bike will feel faster on these sections.

Should I run tubeless tires?

Of course you should, especially if you are riding a mountain bike. Not only will you save weight (always nice!) and avoid annoying punctures (the famous snake bite), but it will allow you to run lower tire pressure (more grip) and decrease your wheels’ inertia (better responsiveness). Most new bikes come with tubeless ready rims, so it’s really easy (and cheap!) to make this upgrade.


Suspension

The 2 most important things to adjust on air suspensions are air (makes sense!) and rebound.

How do I define how much air I need to pump into my suspensions?

First of all, check if there are any manufacturer’s recommendations. Most new bikes with FOX suspension will come with a suspension setting scale that you can fix on the suspension to do the setup. Bikes with Rock Shox suspension usually have a recommended air pressure scale written on the suspension.

FOX

Rockshox

Fork

1 Screw your shock pump to the valve (located on the fork’s crown or on the shock’s body) and 2 start adding or removing air according to the manufacturer’s recommendations. If there’s no info, you can start pumping in the equivalent of your own weight in PSI into the fork and twice your weight into the shock.

shock

If you have one of these setting scales, fix it to the fork/shock (they have different scales, so be sure to put the right one on!). Get on your bike carefully, without jumping on it (ask your friend to hold your bike). If your bike has a TwinLoc or any other suspension lock-out system, make sure your suspensions are fully open before doing this.

1 Now simply get into standing riding position without touching your brakes. Shove the rubber O-ring down to the seal of your fork/shock (or ask your friend to do it). Now get off your bike as carefully as possible (again, without jumping off).

2 The rubber O-ring has moved and indicates the “sag” (distance from the fork/shock seal to the rubber or how much travel goes into your suspension with just your body weight). If you are using a suspension setting scale, see whether the rubber is within the recommended values . If you aren’t using one of these rings, you will have to use a ruler and measure the sag.

Generally, it should be between 20 to 25% of travel length for your fork and 25 to 33% of shaft length for your shock.

Tip!

Suspension pressure is based on the rider’s weight. So if you are carrying a heavy backpack on your ride, it is better to adjust your fork and shock setup once you’re all geared up.

How do I adjust my suspension’s rebound?

This defines how fast your suspension comes back after an impact. If you feel that your bike is bouncing around, your rebound might be too fast. If you feel that your suspensions are sinking and you are getting less travel, your rebound is probably too slow and your suspensions aren’t coming all the way back. You can adjust your rebound using 1 the knob generally located under the fork’s tube and 2 on the shock’s body.

Start with a middle position. If this position isn’t obvious (like on the fork for example), turn the knob all the way to one direction, then all the way to the other direction and count the number of clicks. Then turn back half the amount of clicks you counted. You should be in the middle. Rebound is easy to adjust and play around with. So do not hesitate to try different rebound settings while riding your home loop and see what feels the best!

Your bike’s rebound has strong relationship with how much air you have in your suspension. Generally, the more air you have in your suspension, the firmer (+) your suspension needs to be, so the knob is turned more to the right. If you have less air in your suspension, you likely will need the rebound to be softer (-), which you can adjust by turning the knob to the left. Start with 2-3 clicks in either direction and see what feels best! Too fast could bounce you over the bars and too slow will pack down and feel harsh after a few impacts.

Tip!

Use the o-rings on your fork and shock to take note of how much suspension you are going through. If you’re using all of your suspension or next to none, this is a good sign that adjustment needs to be made.


You are ready to go!

With those basic checks and set-ups, you will be sure to ride comfortably and safely on any bike! Don’t be afraid to try different set-ups and adjust again. “Test and tweak” is the ultimate rule when it comes to bike set-up! However, if you aren’t comfortable with all this, it is always better to get advice from your local dealer or from an expert. Keep in mind that only an optimally adjusted bike will make for the most fun!

Want to go a little further? Read my next article to pick the right accessories for your bike!
Until then, have fun on the trails!
- Tessa


Up next from Ask 'Tessa
Sign up at the Newsletter Below for Updates

What Accessories do you Need
How to Get into Biking
Should I buy an e-bike?